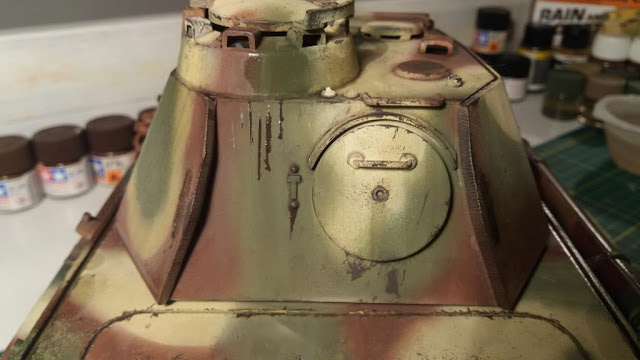
The fading consist of reproducing the paint faded due to climate agression as well as elements like sand, earth etc.
Due to the sun, rain, frost, dust etc the original colour is affected.
Oils or enamels? For many years I was using oils, now I'm using enamels like Model Master's or Humbrol's one.If you have plenty of time to let the oil dry for 1 maybe 2 weeks you can use oils of course but due to lack of time I had to find a quicker solution.
The fading with enamels or oils are very easy to do, again see real references to guide you. You must know where to place the various colours you are using but also how it can affect the base colour.
As a security, I sprayed a layer of satin varnish before the fading.
Here you have something I found useful, it is the primary, secondary and tertiary colours diagram:
If your base colour is yellow like on the German vehicles, adding blue with give you green shades. But blue over green will give you deepness on the green.
The colours I'm using on this Panther are: White, Buff, Dark Brown (Burnt Umber), Red Brown (Burnt Sienna), Cobalt Blue, Light Grey, Kaki and Ocre.
Here a brush N° 1 or 2 will be necessary, a flat brush to blend the paint, thinner and some paper towels to remove the excess of thinner as well as cleaning your brushes.
If you are using oils, depending of the brand, you need first to put the paint on a piece of cardboard. On that way the excess of oil will be removed by capillarity.
Also placing them on this piece will help you to pick the paint more easily.
For the enamels, shake the jar well, I even use a toothpick to shake the paint well.
I recommend you to work on one area at a time. f.e: the frontal armour then the side etc.
Once dry, you can repeat the process until you are satisfied with the result.
First place the lighter colours in small dots, in a random way in terms of size and distribution.
Next: the ocre, grey, buff
The darker tone like the dry brown is placed around the details and shadowed areas to emphasise the deepness.
You can place some points of red brown to create some light rust streaks.
Now with a flat brush wetted in thinner for enamel, we will blend the tones together with vertical movements.
It is important to keep the brush clean and only wetted not flooded with thinner while you are melding the colours.
More paint you will remove, lighter the fading will be.
You can place some lighter or darker paint over some areas you want to highlight or darken.
Before the washes, I'm putting some darker colour dots around that I will blend.
Always remember to blend and stump the colours.
Here you can see the difference with the fading and without:


